Game development studios usually setup a dedicated Mac as a build-server for Unity3D projects enabling a single machine to generate Android, Windows, Linux and iOS builds.
There’s a lot of work an engineer can do to get builds running a significantly faster. I’ve been able to reduce the build times on one recent project from close to two hours to under five minutes using Docker, Vagrant and Linux with gobs of RAM.
Now you won’t see those kinds of performance gains with the following tricks because the work I undertook was specific to that project, but the following list of generic tricks will go a long way to reducing those build times to just minutes.
Apple’s macOS is really tuned for “general user computing” but a build server isn’t really a “general user computing” scenario, so we can tune macOS for this specific use case and reap the benefits. Just don’t do this to a Mac you use for day-to-day computing tasks or as a primary development machine.
First Trick
Let’s start simple, this command:
mount -vuwo noatime /
Will remount your root filesystem and turn off access times on files and directories. Build servers don’t really need that information stored.
The modification will change back on the next restart.
It gives a minor performance boost of 2% to 6% depending on which project you are building.
You can make this permanent by afixing a plist for it in your startup, just make sure you chown it to root:wheel otherwise you will have issues when you restart your Mac.
You don’t want to do this on a Mac that you use for general purpose work.
The modification won’t have an adverse effect on your system, but some backup software and other utilities use last access time for various reasons.
Remember! During simple file access… Read! Don’t write! Which is the exact opposite of how I treat social media.

Second Trick
This one is a bit more involved, it requires you to have two volumes on your macOS build server.
We can all agree that inode lookup is expensive no matter which way you cut it. We can alleviate that by locking our inodes in RAM for the duration of a build.
You need to have two volumes on your Mac, both can co-exist on the same HDD or SSD.
You need a volume that mounts your root file system, e.g. /, the OS, your applications, and any other extraneous files. You will also have a secondary volume that is sized about 200GB for the project assets and Unity3D Library file.
Brew install vmtouch
Then vmtouch the second volume to load your inodes in RAM, and use the option that will lock them in RAM.
You can wrap whatever build script you are using with a vmtouch -dl /ProjectBuild and then killall vmtouch at the end of the build.
If you tweak your build script to vmtouch evict between each build phase, i.e. import/export, you may or may not see a performance improvement. I saw a small-ish performance gain on one Mac but no difference on another. YMMV.
DO NOT vmtouch your entire root FS and lock it in RAM, all you will end up doing is locking up your entire macOS as it runs out of memory and begins swapping to disk.
If you git clone vmtouch and build your own version you will get a couple of extra features that the homebrew vmtouch doesn’t include, e.g. inode watch that will refresh its cache as the files change. I’m seeing a build time performance boost using this trick.
Note that in vmtouch you can inode cache just a specific directory but I cannot say I have had a lot of success with this on macOS due how HFS+ works.
Third Trick
Repartition your drive and upgrade to APFS on the second volume.
Really!
It is worth the extra trouble. Especially if you are using a regular old file copy build script trick to reduce import times between bundle imports.
I don’t recommend using APFS for your entire drive, but it is worth installing it on a second volume if you can live with a brand new FS that most utilities don’t know how to handle. I’ve been running the beta of APFS since Apple announced it at WWDC 2016 on my development Macbook on a second volume, and it has been pretty stable so far. Again, YMMV.
Fourth Trick
Change your swappiness. Make it more aggressive. Set it around 90% or 95%.
If you have to ask how to do this, you probably shouldn’t be doing it. I saw a good 15% performance gain on my build times when I did this. You can find the changes in sysctl
Fifth Trick
Change your memory pressure and your free page targets.
Up the memory pressure to 40 or 50 and lower your free page targets to below 500.
Adjusting further I didn’t see any performance gains.
Again, if you have to ask how, you probably shouldn’t be doing it.
Sixth Trick
Got 16GB RAM?
Create a small-ish 4GB RAMDISK and then:
- Symbolic link your Scripts directory to the RAMDisk.
- Symbolic link your output directory to the RAMDisk.
- If you feel you have enough RAM, symbolic link any AssetBundle output directories to your RAMDisk.
I highly recommend you format your RAMDisk to use APFS as opposed to HFS+. APFS will give you better inode management, file compression and block de-duplication along with several other performance gains.
Seventh Trick
Got 64GB RAM on your Mac?
Load the entire project into a large 50GB+ RAMDisk and go to town.
This one single trick will turn a slow-to-build, sluggish iteration cycle into something that is, if not a pleasure, that is at least tolerable.
Eighth Trick
Running a brand new Macbook or iMac with Thunderbolt3? Pick up a Thunderbolt3 PCIe enclosure ($280) and a StarTech or ASUS PCIe M2 adapter ($25). Install a 250GB Samsung 960 Pro M2 in it ($140).
I’ve tried one out and disk read speeds are close to six times the speed of what you will get from the SSD built in to your Mac and disk write speeds are over seven times faster.
Yes, 3GB/s read and 2+GB/s write compared to the 400MB/s and 300MB/s on a regular Macbook SSD.
Ninth Trick
Install Unity Cache Server directly on your build server, then configure Unity3D to use that Cache Server.
Alternatively, open up Unity3D, navigate to Edit / Preferences / Cache Server and set up a local cache. Unity’s built-in cache server (which is actually a slightly modified form of the regular Unity Cache Server) is limited to 200GB, which should be enough for an entire project.
Only caveat is sometimes Unity gets confused over its own internal cache server.
Tenth Trick
This one is expensive but also the easiest.
Use an 8-core Mac Pro with 64GB RAM and dual SSDs. Install a second M2 PCIe with Samsung 960 Pro.
The Mac Pro RAM has significantly more bandwidth that either the iMac or Macbook Pro and the SSD runs over PCI Express. A second SSD on the PCI Express bus will give you 3Gigabyte/s transfer rates as opposed to 500Megabyte/s transfer rates.
Make sure you install APFS on the second drive as that will also give you a massive performance boost.
If you generate AssetBundles from your project, or import a number of other projects from outside developers, you can run several copies of Unity3D in parallel to do all the work at once using a make -j10.
Setting up Unity3D to run in parallel is beyond the scope of this article, but feel free to drop me an email at justin@otakunozoku.com and I will walk you through how to do it.
With 64GB RAM you can load the entire project into a 56GB RAM Disk and reduce your build times significantly.
I mean significantly.
As in, minutes.
And Just One More Thing…
Running Unity3D on Windows?
Have 16GB or 32GB of RAM on your workstation?
Install PrimoCache, create an 8GB or 16GB cache and let Unity just eat it up.
Project load times are massively reduced and Unity3D responsiveness is significantly increased.
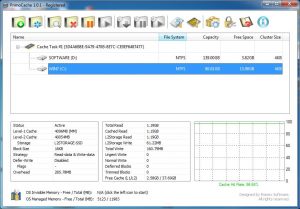
PrimoCache for Windows
: The Social :


: Categories :
- Advice
- Articles
- Book Reviews
- Business Development
- C# Wisdom
- CSS3 Wisdom
- Games Industry
- Ideas
- iOS Wisdom
- iPad Wisdom
- iPhone Wisdom
- Microsoft SQL Server Wisdom
- mySQL Wisdom
- Objective-C Wisdom
- Paper
- Personal Development
- Personal News
- PHP Wisdom
- Projects
- Quips
- SenseCam
- Software Development
- Software Reviews
- Software Wisdom
- SQL Wisdom
- Toy Box
- Unity3D Wisdom
: Google Link Unit :
: Latest Posts :
- Ten Tricks to Speed Up Your Unity3D Mac Builds
- You’re Gonna Do What Now?
- Javascript designed to annoy
- You’re Not That !important
- AWS Upgrades
- Better than a box of Kinects
- HAML gets duck punched
- Robotic Storage System For Electronic Components
- Claimed Ownership
- Wonderfully Unproductive Day
- Not Important
- Distributed Digital Signage System
: Google Link Unit :
: Interesting Posts :
- A wild adventure
- No sex please, we’re Unix
- Digital paper won’t replace books any time soon
- Little League Baseball 2002 (GBA/US)
- Shrek The Third (PC/JP)
- No doughnut for you
- Optimized Sleeves